
Selectors are one of the key items of CSS, if not the key item. In fact, they allow you to identify which parts of the page will receive a given style. Thus, you must know CSS selectors pretty well. In this tutorial, we will see how they work. We will cover both the basics you always need and some not-so-common but useful ones.
As you can see, CSS Selectors are just one of the components you need to style your page. To understand them, you’ll need to know the basics of CSS: if you feel in need of a refresher just check this CSS Tutorial.
The Basics of CSS Selectors
Getting Started
We covered this more deeply in the Getting Started with CSS Guide, but we can just mention the highlights here.
With a selector, you identify the elements in your HTML page that will receive a style. The syntax you have to use is simple: you write the selector and after that, between curly brackets, you put all the styles you want apply.
selector { styles }Selectors allow you to select elements, and you can do that by referencing some of their attributes. Most notably:
- Element name, written as-is
- Class name, prefixed with a dot
- ID, prefixed with a pound sign
This will result in something like the following examples.
h1 { styles }
.class-name { styles }
#id-name { styles }
You can combine multiple selectors together to target a more specific device. In the following example, we will apply this rule only to an h1 tag if it has the class class-name.
h1.class-name { style }Now that we have the basics in the rear mirror, we can move onto the advanced stuff.
Advanced Standalone Selectors
So far, we know that we can select based on element name, class, and ID. That’s definitely not it, we can reference more than that. Particularly, we can select based on any HTML attribute.
Selecting by HTML attribute means we will apply a rule only if the element has a specific HTML attribute with a specific value. We must pair this with the name of the HTML tag where we are looking the attribute in.
A common way to use this is on the type attribute of input elements. This is useful, for example, if we want to style passwords differently than text fields.
The syntax to use this is simple, you write just after the tag name the name of the attribute, equal sign, and the value you are searching, all wrapped in square brackets. If we want to select only text inputs, for example, it will look something like this.
input[type=text] {
  background-color: red;
}
Just like before, you can always combine this with other selectors, such as class and ID. Just be sure the part between square brackets is always attached right after the tag name. In other words, these examples are correct:
input[type=text].login { ... }
input[type=password]#bottom-field { ... }
While those ones are wrong:
input.login[type=text] { ... }
input#bottom-field[type=password] { ... }
.login[type=password] { ... }
Select Everything
In some circumstances, we may want to apply a rule to all the items in the page. In that case, we can use the star selector (*).
* { ... }Use this with caution! However, note that his (by itself) is a weak selector. In other words, if any other selector specifies a different value for a style property defined in this selector, it will override it. That’s because, in CSS, if a property is defined twice the most specific selector always wins.
How to Combine CSS Selectors
So far, we have seen some way to select individual elements by targeting some of their properties, like class or ID. However, CSS selectors can do way more than that. In fact, we can use them to identify items based on their position in relation to other elements. In this section, we will see exactly how to do that.
Descendant Selector
This one of the firsts you need to use. Descendant means that an element, inside the HTML, is contained inside another somewhere. An example will make everything clearer.
<div class="a">
  <div class="b">
    <div class="c">
      <p class="d">Hello!</p>
    </div>
  </div>
</div>
Here, we can see we have one parent element (div.a), which contains all the other elements. All the other elements (div.b, div.c, and p.d) are inside div.a, so they are their descendants.
Often, we want to use this descendant selector to target specific elements in our HTML page. For example, we may target all the elements with class d that are contained as descendants in elements of class a. If an element of class d is not a descendant of class a, it won’t receive the rule. To do that, we can use the following syntax.
.a .d {
  background-color: red;
}
Note the space in the selector. In fact, .a.d means we want to target an item that has both class a and b on it. Instead, .a .d means we want to target all the items that have class d, but only when they descend from class a. The space is crucial!
Direct Child Selector
Sometimes, targeting descendants is still too loose as we end up selecting some parts of the page we did not want. That happens most often when we have large pages with many HTML elements. Sometimes, we want something more specific.
A direct child selector allows you to select only the items that are immediately below another item. We can take our previous example and tweak it a little.
<div class="a">
  <div class="b">
    <div class="c">
      <p class="d">Hello!</p>
    </div>
  </div>
  <div class="c">New stuff here</div>
</div>
Note that we added <div class="c">New stuff here</div>. This, just like div.b, is a direct child of div.a.
To use the direct child selector, we use > symbol. On the left, we write the selector of the parent, and on the right the selector for the children. In this case, we want to select all children of a only when they have class c.
.a > .c {
  background-color: red;
}
We can also get creative and select all the direct children of an element (and only those) by using the star selector.
.a > * {
  background-color: red;
}
Siblings Selector
We can do a lot with descendant and direct child selectors. However, sometimes we might want to select items that are on the same level, that are siblings. A good example of that is the combination of input and label.
<form action="contact.php" method="post">
  <input name="email" type="email" id="email">
  <label for="email">Your email</label>
</form>
In this example, we might want to style only the labels that come right after an input. We can do this with the + sign.
input + label {
  background-color: red;
}
In other words, the syntax is element1 + element2 and will style only element2 when it comes right after element1.
Combine unrelated CSS Selectors
If you want to build a website consistent with your brand identity, some styles will just repeat themselves. You will have always the same kind of fonts and colors all over the page, for example.
In other words, you may want to select multiple items of your page and apply to all of them the same rules. More specifically, each of these elements has nothing to do with the other. Well, you can use multiple selectors separating them simply with a comma.
a,
p,
input[type=text],
form > textarea {
  background-color: red;
}
In this example, we are applying the style block to four separate elements: a, p, input[type=text], and form > textarea. As you can imagine, you can use any type of selector and list as many of them as you want.
Special CSS Selectors
In this part of this CSS Tutorial on Selectors, we will see some special CSS Selectors. They allow us to select some particular elements that are in a particular state.
Links and their States
If you remember, back when we were talking about HTML Links, we covered their various states. In fact, any link can be:
- Unvisited if you never went to the target page
- Active if you are clicked on it and the page is loading (so it will be active very briefly)
- Visited if you already went to that page
We can apply different styles depending on what state the link is on. This is possible with :link for unvisited links, :active for active links, and :visited for visited links. We should apply these special selectors to an a tag. Pretty quickly, we can end up with something like the code below.
a {
  // This would apply to all links
  color: blue;
}

a:link {
  // Only unvisited
  color: green;
}

a:active {
  // Only active
  color: red;
}

a:visited {
  // Only visited
  color: purple;
}
As a link must be either unvisited, visited, or active, the first rule (the one just for a) will never be applied. That’s because rules for the various states are more specific.
Hovering
This one of the special CSS selectors you will use most often. If you want to change the style when the user is hovering with the mouse on top of your element, you can do that with the :hover selector. The rules will be applied as long as the user keeps the cursor over your element.
A common use of that is for links and button, like so:
a {
  text-decoration: none;
}

a:hover {
  text-decoration: underline;
}
In this case, our link will have an underline only when the user passes hover with the mouse.
A tip: you can use this selector on any element, and even use it to compose more complex behaviors like so.
input[type=text]:hover + label { ... }
.menu:hover .menu-item > p { ... }
.menu .menu-item:hover > p { ... }
In the latter two cases, the style will apply to the p element, but only when its parents (respectively .menu in the first case, and .menu-item in the second) will be hovered.
Children
In some particular situations, you may want to apply some rules to only some of the children of an element. In this case, the normal child selector may not be enough. That’s the case if you want to apply different rules, for example, based on the position of this element among all the children.
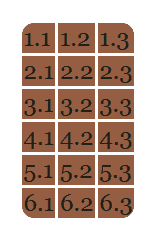
All this may sound abstracts, but an example will help you understand it isn’t. Imagine you have a table and you want to round its corners. This also means you have to round four of its cells:
- Top-left corner of the first cell in the first row
- Top-right corner of the last cell in the first row
- Bottom-left corner of the first cell in the last row
- Bottom-right corner of the last cell in the last row
We can do that easily by using the :first-child, :last-child, and :nth-child(n) selectors. Just know that, with :nth-child(n) you have to provide the number of the child. For example, :nth-child(3) means you will select only the third child.
Below the HTML we want to style.
<table>
  <tr><td>1.1</td><td>1.2</td><td>1.3</td></tr>
  <tr><td>2.1</td><td>2.2</td><td>2.3</td></tr>
  <tr><td>3.1</td><td>3.2</td><td>3.3</td></tr>
  <tr><td>4.1</td><td>4.2</td><td>4.3</td></tr>
  <tr><td>5.1</td><td>5.2</td><td>5.3</td></tr>
  <tr><td>6.1</td><td>6.2</td><td>6.3</td></tr>
</table>
To achieve the desired result, we can do something like this.
td {
  background-color: #955E42;
}

table tr:first-child td:first-child {
  border-top-left-radius: 0.5rem;
}

table tr:first-child td:last-child {
  border-top-right-radius: 0.5rem;
}

table tr:last-child td:first-child {
  border-bottom-left-radius: 0.5rem;
}

table tr:last-child td:last-child {
  border-bottom-right-radius: 0.5rem;
}
This will yeld the following result.
Before and After CSS Pseudoelements
Now we can go in one of the most obscure yet useful CSS selectors. The ::before and ::after pseudoelements. Note that these are pseudoelements, and so we use double colon (::).
We call them pseudoelements because they allow you to use CSS to create a fake HTML element before or after an existing one and style it. So, for example, p.my-class::before will apply the style to a fake element, create right before any paragraph with the class my-class.
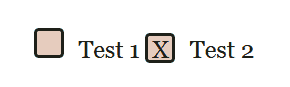
Why would you need that? This powerful tool has many uses, and all of them are quite advanced. However, you mostly use it to create beautiful radio boxes or checkboxes.
To test this out, create some HTML like the one below.
<input type="checkbox" name="test_field1" id="test1"><label for="test1">Test 1</label>
<input type="checkbox" name="test_field2" id="test2"><label for="test2">Test 2</label>
Note that for this to work is crucially important that you define IDs and the for property of labels. In this way, when the user clicks on the label the checkbox will go checked or unchecked. As we are going to hide the checkbox itself, this is fundamental.
Then, we can apply the following style. Note that as it’s not really possible to use ::before directly on input, we use a sibling selector to identify the label right after our checkbox.
input[type=checkbox] {
  display: none;
}

input[type=checkbox] + label::before {
  display: inline-block;
  margin-right: 0.6em;
  border-radius: 0.2em;
  border: 2px solid #1E2019;
  color: #1E2019;
  height: 1em;
  width: 1em;
  background-color: #E6CCBE;
  content: ' ';
  text-align: center;
}

input[type=checkbox]:checked + label::before {
  content: 'X';
}
A few more things worth mentioning that may not be so obvious. The :checked selector applies only to checkboxes when they are selected. Instead, the content property sets the text we want inside our pseudoelement.
This will result in the following (we selected the second input to show you the difference).
Become a Full Stack Developer!
In case you are new here, we are running a Full Stack Development course (for free). This will teach everything you need to create amazing applications. Well, this tutorial is part of this larger course, and as part of it there are some exercises we need to do.
In our course, we are building the website of a pretend bakery shop, and now that we are styling it we can apply some of the rules we learned here to make it more beautiful. No, it will still be ugly after this tutorial, we haven’t learned that much just yet. Sorry!
Today’s assignment is simple. We want our links in the header to be bold and without any underline, while keeping them “normal” in the footer. In addition, we want to remove the bullet from the list in the header (list-style: none;). Our final result should look something like this (we are looking at the order page). Be careful, below you will find the solution.
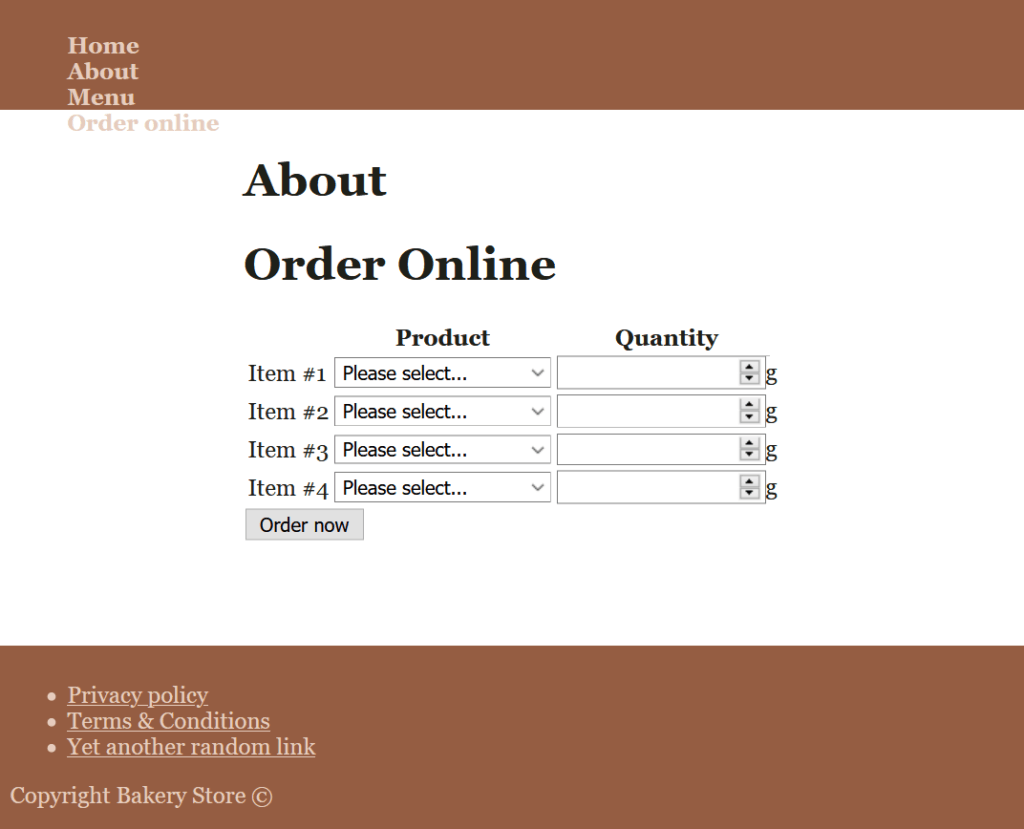
Try to do this on your own! It’s not that hard after all. In case of doubt, remember you only need to modify the CSS file for this exercise. Once you finish, you can check the solution right below.
So here’s the solution for this exercise. Quite simple.
header ul a {
  text-decoration: none;
  font-weight: bold;
}

header ul {
  list-style: none;
}
In case you want to get the full picture, check the repository on GitHub at alessandromaggio/full-stack-course. More specifically, you can find all the changes we made in this tutorial by looking at this commit.
In a Nutshell
In this tutorial on CSS Selectors, we saw how to use these selectors to better identify various elements on our page. If you are looking for an extensive list of selectors, you can check out the one made by the W3C. The following table shows you the most commonly used selectors (TL;DR).
| Example | Description |
|---|---|
p | Element “p”. |
.custom | Select any element with class “custom”. |
#test | Any element with the ID “test”. |
div > p | Select a “p” tag directly contained into a “div”. |
div p | A “p” tag contained somewhere into a “div”. |
a:hover | Select an “a” tag only when the user hovers it with the mouse |
td:last-child | Select the last child “td” element of its parent. |
td:first-child | The first child “td” element of its parent. |
::before | Create a pesudo-element before. |
::after | Create a pseudo-element after. |
Keep going! You are building up your CSS skills and sooner than you think you will be able to create an amazing website.

