
Okay, with the last article we jumped on Python. With that, we know how to insert input data manually, every time the program runs. Without any doubt, this is not the best way of working on large sets of data. In fact, we want to store data to read them later: we want to load and save, just like in Microsoft Word. Well, look no further – in this article we will present how to do that by managing files in Python.
Files in Python… for beginners?
Many traditional textbooks present how to handle files later in the course. Instead, in our Python tutorials, we want to present them as soon as possible. With the last article, you have touched all the basics concepts of Python. Just when you start creating functional scripts, the traditional textbook drifts away. You might expect to talk about functions and classes, and this might be okay.
However, we want you up-and-running with Python as quickly as possible. Since you don’t strictly need to have a good understanding of functions and classes to load and save a file, why not go straight for it? With that, we will create a script that does something extremely useful.
Input and Output
All software and programs take some input and give some output. The program starts and receives some data to process. Then, after the elaboration, it put somewhere the results. Your software will have several ways to both receive input and return results. For example, you can ask the user to provide input at the command line. You can simply print the result to the screen, or you can save them in a file. Of course, you can also load input data from a file as well.
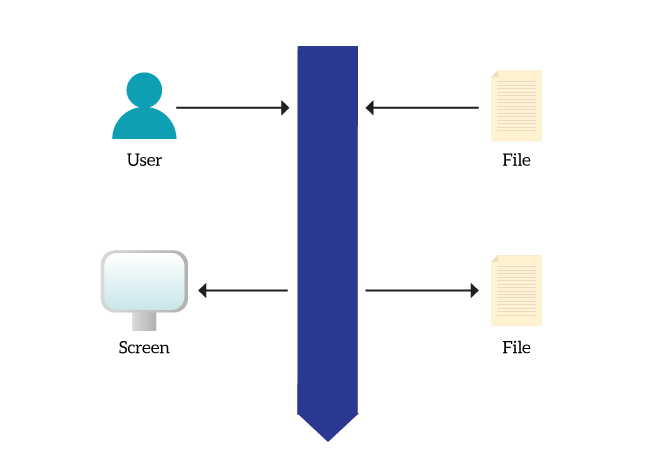
At this point, you may think about a program as something static. It starts, gets data somewhere, put data somewhere else, and it is done. Some programs are just like that, like the one we are creating today. But believe me, any program has the input/output logic. Even video games, they take what you press on the keyboard as input, and returns a new frame to your screen. They continuously ask for input, and continuously return data.

As you can see, everything is about input and output. If you can work with them easily, you will make any program better.
Managing Files in Python – the basics
Open a file in Python
Python, like many programming languages, has the concept of opening a file. You tell your program to open a file, and this creates a variable that you can use to interact with the file. You can read from it, and write in it.
The modes
When opening a file, you need to specify how you would like to open the file. Are you going to read it? Or, are you going to write on it? You have several possibilities:
rmeans you will be reading from the filewmeans you are going to write in the file, overriding the contentameans that you are going to write in the file but after the existing content (append)
For all these options, the files must exist – Python won’t create a file on its own. Thus, if the file does not exist, it will throw an error. To avoid that, and create a new file if there is no existing one, you can add + to the mode. You will end up with r+, w+ and a+.
The code for opening a file in Python
Okay, but what is the code to open our beloved file? How do we specify the mode we talked about? Python is extremely intuitive and has an open() function to do that. Here’s a simple snippet.
file_variable = open(path_to_the_file, open_mode)
The path_to_the_file can be the file name in case the file is in the same folder as the script. Otherwise, it will look something like /subfolder/sub2/temp/file.txt. The open_mode is a string with the mode, so here’s a working example.
file_variable = open('input.txt', 'r+')
If you run a script with that code, it will create the file in the same folder as the script. Before continuing with our explanation, better creating a file to test what we are doing.
Simple Text files in Python
The simplest file in the world is probably a .txt file. It can contain only text, no fancy graphic or even text formatting styles. In the folder where you are working on Python scripts, create a new file named input.txt, you can do that with notepad. In the file, write a string of your liking – here’s an example.
This is my very first text file.
We are going to use this as input for a simple program.

Yay!
Of course, you can name the file whatever you want, we named it input just to be clear. Once we created the file, the most intuitive thing to do with it is opening and reading it.
Reading the file with Python
With a text file, you have two options. You can read the entire file immediately, or you can read it line by line. To do that, you need to call the read() function or the readline() function on the file variable you create when opening the file. The first will give you the content of the entire file, and the second the content of the first line that was not yet read.
You can also use .readlines() to read all lines and create a list containing the content of each. For all these three functions, you can easily print the results on the screen. Look at these examples.
Read the file as a whole
Here we use the read() function to read the entire file in a single line.
# Open the file in read mode plus
# We store the file handler in the variable 'file'
file = open('input.txt', 'r+')
# We store the file content in the variable 'file_content'
file_content = file.read()
print('The file content is:')
print(file_content)
And this will produce the following result.
C:\Users\aless\Desktop>python myscript.py
The file content is:
This is my very first text file.
We are going to use this as input for a simple program.

Yay!
Read the file line by line
Since we know that the file has four lines, we could use a for loop. Here’s an example of that.
# Open the file in read mode plus
# We store the file handler in the variable 'file'
file = open('input.txt', 'r+')
for i in range(4):
  # We print the file, one line at a time
  print(file.readline())
Here’s a much better way that uses the readlines() function. This is better because we don’t have to know the number of lines beforehand.
# Open the file in read mode plus
# We store the file handler in the variable 'file'
file = open('input.txt', 'r+')
# We can directly loop on the lines
for line in file.readlines():
  # We print the line each time
  print(line)
Both will result in the following output.
C:\Users\aless\Desktop>python myscript.py
This is my very first text file.

We are going to use this as input for a simple program.


Yay!
You can see that there is more space between lines. This is because each line ends with special characters, \n, which symbolizes a new line. The print function, however, adds another new line. As a result, we have two of them. You can see that by printing the list of lines with print(file.readlines()). It will give you the following output.
['This is my very first text file.\n', 'We are going to use this as input for a simple program.\n', '\n', 'Yay!']
Writing on a file
Now, we are going to use our w+ read mode to write in the file. Writing is much easier than reading because you basically print to the file. To do that, you only need one function: write(). Look at this example, that will also create the output.txt file.
# Open the file in write mode plus
# We store the file handler in the variable 'file'
file = open('output.txt', 'w+')
# Here we have a list of names
names = ['John', 'Amy', 'Mark', 'Bob', 'Jessica', 'Megan', 'Donald']
# We loop through the list...
for name in names:
  # We write the name to the file
  file.write(name)
  # We write a new line so that each name is on a line
  file.write('\n')
print('Finished!')
Now, we are going to have this content in output.txt.
John
Amy
Mark
Bob
Jessica
Megan
Donald
Pretty neat. You can combine these functions in many ways, for example, to keep an input file and an output file open simultaneously.
Closing the file
All good things come to an end. In the same way, whenever you open files in python you need to close them once you are done. This way the file is completely detached from your script and other applications access it. If you don’t close the file, you might end up corrupting it. Anyway, to close the file you simply call the close() function on the file.
file.close()
The better way
Since we are just starting, we do basic operations with files. In a complex program, however, you might end up with files that stay open for hundreds of lines of code. Even more, you may open a file within a selection construct (if/else) and close it later on. You might end up with some files that are left open, and this is a problem. So, we use the with construct, which takes a function like open() and a placeholder name. It is simpler than it might look.
with open('input.txt', 'r+') as file:
  # Here we are inside the with construct
  # We can use the 'file' variable
  print(file.read())
# Now we are back outside the with construct
# So the file is automatically closed
# Using 'file' here will result in an error
This way, once we finish working inside the “with” construct, the file will close automatically. This is way better!
Reading CSV files in Python
What is CSV?
CSV stands for Comma-Separated Values, and it is a simplification of an excel file. We can think of it as a way to write spreadsheets in a plain text file. A spreadsheet is a table after all, and we can think about each row of a table as a line in a file. To separate cells on the same row, we use a comma. Thus, we obtain a CSV file. As simple as that.
You can create CSV files with Excel by selecting CSV in the Save As dialog. Otherwise, you can write them manually in Notepad and save them as .csv.
Reading CSV files in Python with the “csv” module
We can do all the heavy lifting on our own, with the tools we already know. However, Python has a module that handles CSV files. This is just a set of existing Python code written by someone else that deals with all the details. By using the csv module, you can interface with CSV files in Python without worrying too much about the details. To tell your script that it is going to need that module, we begin it with import csv.
Then, we open a file and we create a special CSV reader. This variable will handle the way you read the file, and you can loop on it. At each loop cycle, you will see an entire row, presented to you as a list. Here’s an example.
The Code
# We specify that we need the csv module
import csv

# We open a CSV file like any other file
with open('variables.csv', 'r+') as file:
  # We create a reader object
  # Note that when creating the reader, we can optionally specify
  # - delimiter, the character used to separate cells
  # - quote character, the character used to enclose a single cells
  #    this is needed in case you want to include the delimiter
  #	 character in the value of your cell
  my_reader = csv.reader(file, delimiter=',', quotechar='"')
  # We loop through the rows of the files
  for row in my_reader:
    print("ROW:")
    # We loop through the cells in a row
    # This is possible because 'row' is a list
    for cell in row:
      print(" " + cell)
    # We print an empty line after finishing the cells
    # So the output is clearer
    print("")
Input and Output
Meanwhile, we have created a simple CSV file as an example, the variables.csv file. The content is fairly simple, and feel free to expand it as you wish.
John,Doe,22,American
Mark,Craig,39,British
Isabelle,Moretti,29,French
By running the script with this file, you will see this output.
C:\Users\aless\Desktop>python myscript.py
ROW:
 John
 Doe
 22
 American

ROW:
 Mark
 Craig
 39
 British

ROW:
 Isabelle
 Moretti
 29
 French
Templating with files in Python
Introducing Templating
What do we mean by templating? Well, the concept of creating a template. Imagine you have to create several copies of the same item, with slight modifications. For example, we may create a greeting letter – the letter is always the same, but the salutation and name change for each receiver. By using CSVs and text files, we can create a CSV file with all the variable items, and a text file with the master template.
Later on, we can run the script and create multiple output files where the template is compiled with the variables from the CSV file. This comes quite handy in multiple applications in IT. One of them is networking, where you might end up configuring multiple devices with very similar configurations. Today we are going to do exactly that.
The concepts behind templating
In our CSV file, each row will result in a different output file. This makes a lot of sense because each row can have many columns, and the columns are likely to stay the same for all the rows. In each cell, you put a variable item. For example, in the first cell of each row, we could put the name of the device for which we are doing the template. This way, we can ultimately visualize all our items for which we need to create a file and their variables in a table. This is extremely convenient.
From that, we can also understand an important thing. Each cell could be identified by a number within a row. This way, the first cell is going to be 0, the second is going to be 1 and so on. Remember that, as we are going to need it.
#1 – Creating the variables
Our example script creates the configuration file for a Cisco switch. So, we need to define what are the variable configuration items we can specify in the CSV. For our example, each switch will be configured with Hostname, IP address, Subnet Mask, and default gateway. Therefore, each row will have four cells. Here’s an example of a CSV file respecting that concept.
HQ-AccessSwitch-01,192.168.5.10,255.255.255.0,192.168.5.1
HQ-AccessSwitch-02,192.168.5.11,255.255.255.0,192.168.5.1
HQ-AccessSwitch-03,192.168.5.12,255.255.255.0,192.168.5.1
Brach-AccessSwitch-01,192.168.25.10,255.255.255.0,192.168.25.1
Brach-AccessSwitch-02,192.168.25.11,255.255.255.0,192.168.25.1
#2 – Creating the template file
Now, we need to create the template file. It will include some placeholders that indicate “Put here the first cell, here the second and there the third”, or something like that. You can create placeholders the way you like, but here we decided to stick with a syntax similar to Python.
So, in our file, the placeholder will be the number of cells within curly brackets. If we want to say “Put here the content of the first cell”, we are going to use {0}. If we want the second, we are going to use {1} and so on. Here we have a template that creates a valid configuration for a Cisco switch.
hostname {0}
!
interface Vlan1
 ip address {1} {2}
 no shut
 exit
!
!
ip default-gateway {3}
!
We can store this in the template.txt file, and now we are ready for scripting.
#3 – The Script itself
Working with files in Python is easy. Even the following script is easy, take a moment to look at it.
# We specify that we need the csv module
import csv

# First, we open the template file
with open('template.txt', 'r+') as template_file:
  # We read the template and store it in a variable
  template = template_file.read()

  # We open the list of variables (CSV)
  with open('variables.csv', 'r+') as variables_file:
    # We exract the CSV table with the csv module
    variables = csv.reader(variables_file, delimiter=',', quotechar='"')
    # We loop through the rows in the variables table
    # Each row represents an output file to be created
    for row in variables:
      # We create a txt file with the name of the first cell
      # In this example, it is going to be the device's name
      with open(row[0] + '.txt', 'w+') as output_file:
        # We copy the template to a new variable
        # so that we don't alter the original template
        dirty_template = template
        # we loop through all cells of our row
        for n, cell in enumerate(row):
          # We are going to look for the cell number
          # within curly brackets, e.g. {0}, {1} etc.
          search_for = '{' + str(n) + '}'
          # We replace any occurency of the placeholder
          # with the value of the celll
          # and we update the dirty template so that it includes
          # our last modifications
          dirty_template = dirty_template.replace(search_for, cell)
        # After all the replacements, we save to the file
        output_file.write(dirty_template)
      # Here the output file is closed
      # we inform the user and move to the next file
      print("File '" + row[0] + "' created")
Use the comments to understand the script, then read on for an high-level explanation.
A quick explanation
Nested with constructs, copying variables together, dynamically create a file… this might look complex, but it isn’t. First, we open the template file and we store the content in the form of a string. Then, we open the file containing the variables and we start to loop for all the rows. Since each row represents a different set of data to use for compiling the template, each row will result in a new output file.
When looping through the rows, we start by opening (creating) a new file. To better understand what is what, we name it with the content of the first cell (row[0]). Then, we copy the template to a variable that is local to this part of the code. We are going to alter it, while the template is not modified. Thus, we can re-use the template for the next row. For each cell, we use the replace() function to replace the placeholder with its value. Once we finish, we write the result to the file.
Note that we used the enumerate() function when looping on cells. Looping on cells without that will put in cell the value of the cell everytime, until we pass through all the cells. With enumerate, we also put the number of the cell within a row in the n variable. This way, we can use this value to create the search_for string.
Conclusion
Working with files in Python is great, isn’t it? With this explanation, as well as the focus on templating, you can now create a script that actually does something, and something useful. If you are working in IT as I do, you will appreciate the time you will save with such a script!
Was working with files easy for you? Did you get it right from the beginning? How do you use files the most? Just let me know in the comments!

